Replace Your Glasses Frame at Home (Without Damaging Your Lenses)
Sep 23, 2026
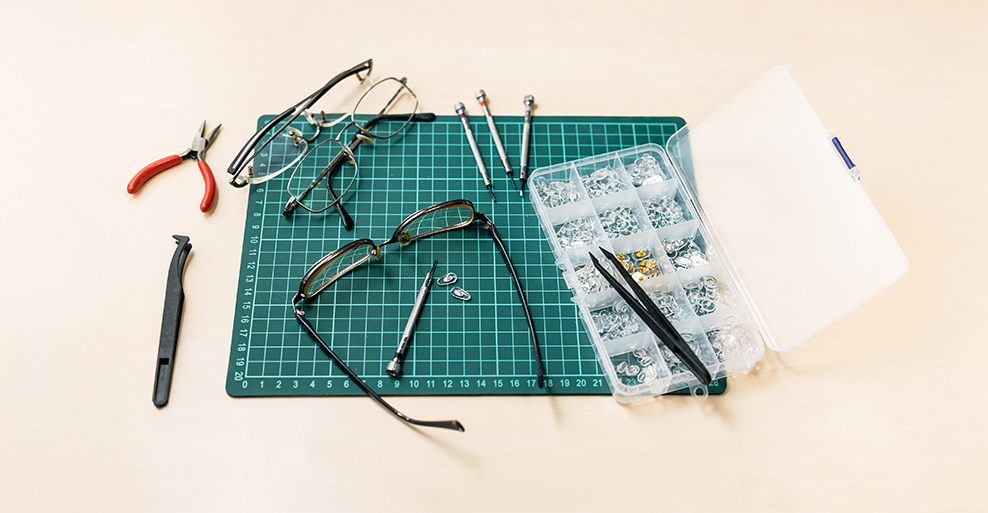
Replacing your glasses frame at home is a great skill to have if your frame breaks or you just want to change them. Replacing the frame is safe; however, make sure you follow the correct steps depending on the frame material and structure. Additionally, respect risk boundaries to avoid damaging lenses.
When do you replace glasses frames at home?
Here are several benefits to being able to replace glasses frames at home:
Save time and money: Replacing frames at home reduces the need to repeatedly go to the optician’s, saving a lot of time. This also saves money, as replacing or repairing frames at the opticians is more expensive than doing it at home.
Emergency readiness: Opticians are not open 24/7, therefore, knowing how to replace frames at home is useful when professional help is not available.
Flexibility with the same lenses: The same prescription lenses can be reused with different frames, including different styles. This means the lifespan of lenses can be extended after frame breakage or if you simply want a change of style.
Identify Parts, Materials, and Structure
Before replacing the frame at home, identify the structure and material of the frame. The structure of the frame determines the correct steps to remove the old frame, and the material of the frame dictates whether to use gentle heating or screw work.
Classify Frame Structure (Full-rim / Half-rim / Rimless)
Full-rim glasses have the lenses fully enclosed in a groove. To remove the frame, loosen the screws if the frame is metal or warm and flex the frame if it is plastic.
For half-rim glasses, the lenses are held by a nylon wire or compression bar along the bottom edge. To remove these frames, unseat the compression bar or release the nylon line carefully.
In rimless glasses, the lenses are attached directly with screws and nylon lines. There is no surrounding frame in this type of glasses, to remove the lenses, unthread the nylon path, loosen the screws, then lift the lens out.
Check Frame Material (Plastic / Metal / Titanium)
Plastic frames require gentle heating with warm water to make the frame more malleable so it can be removed.
Metal frames use precision screws, removing them needs a screwdriver to loosen the screws. If the new frame is also a metal frame, be careful as overtightening screws can cause damage.
Titanium frames are lightweight but stiff and require careful handling to avoid stress on the lenses.
Gather Tools by Frame Type
Before starting, gather all the tools needed for the frame type of your glasses. Always avoid heat guns, boiling water, and keep harsh solvents off lens coatings.
Prepare the Core Kit
The core kit is made up of the following parts:
Microfiber cloth: To protect lenses from scratches.
Small parts bowl: To keep screws and tiny components organized and to make sure small parts are not lost.
Bright light: To ensure a high level of visibility when handling small or delicate parts.
Gloves: To reduce fingerprints and to improve grip.
Optional lens clamp or suction: For additional safety.
Add Material-Specific Tools
For plastic frames, prepare a low-heat dryer or warm water at around 40-50°C.
For metal frames, prepare precision screwdrivers and spare screws.
For rimless or half-rim frames, prepare a nylon line and bar tools for securing and releasing lenses.
Prepare a Safe Workspace
A safe and organized workspace will improve efficiency and reduce the risk of damage to the lenses and frame.
First, set up a non-slip, soft surface to work on, such as a towel, a foam mat, or a padded towel. Then prepare a bright light and small bowls for screws and components. Finally, sanitize hands and tools; gloves are optional.
Remove Lenses from the Old Frame
Metal Full-Rim Loosen the Rim Screws
Loosen the screws just enough to slide the lenses out, and avoid stripping screws. Then open the frame slightly to create space for lens removal and release the lens carefully by sliding it out of the groove. Finally, lift out the lens by holding it by the edges and place the lens onto a microfiber cloth.
Plastic Full-Rim Warm & Flex to Release
Gently warm the frame using warm water (40-50°C) or a low heat hair dryer for 20-30 seconds to make the plastic flexible. Then flex the frame outward and carefully release the lens edge by lifting the edge of the lens from the groove; do not pry during this step. Finally, remove the lens completely and place it onto a microfiber cloth.
Half-Rim Unseat the Compression Bar
First, locate the compression bar and loosen the slot by gently loosening the screws or sliding parts holding the bar. Then release the lower edge of the lens by lifting the bottom edge out of the bar. Finally, remove the lens completely, touching only the edges, and place it on a microfiber cloth.
Rimless Unthread the Nylon Path
First, photograph the nylon path to remember the loop direction and hole order, then loosen the anchors by carefully untwisting or unscrewing the small anchors holding the nylon line. After this step, unline the nylon by pulling on the line gently out of the lens holes. Finally, lift the lens out and place it on a microfiber cloth.
Handle Lenses Safely
Always only handle the lenses by touching the edges to avoid fingerprints or scratches, then place them onto a microfiber cloth when fully removed.
Inspect Lenses Before Reuse
Once the lenses are removed, check for chips, cracks, or coating damage. If any of these issues are found, do not reinstall the lenses; consider replacement instead.
Install Lenses into the New Frame
After removing the lenses from the old frame, reinstall them into the new frame.
Metal Full-Rim Seat & Tighten
First, seat the edge in the groove by placing the lens carefully into the groove of the metal frame, then align the rim so that the lens sits evenly. Next, tighten the screws clockwise, just enough to hold the lenses securely. Do not overtighten, as this can cause damage.
Plastic Full-Rim Warm & Seat, then Cool
First, lightly warm the frame using warm water (40-50°C) or a low-heat hair dryer to make the plastic more flexible. Then seat the corner first by inserting the corner of the lens into the frame groove. Next, press evenly along the edges to fix the rest of the lens into place. Finally, allow the frame to cool naturally and harden.
Half-Rim Set Edge & Lock the Bar
First, seat the lens lower edge and ensure the lens edge sits flush against the frame groove. Then re-lock the compression bar so that the bar holds the lenses firmly in place. Finally, check the alignment; the lenses need to sit evenly without any tilt or gaps.
Rimless-Reline & Tension-Check
Follow the photo path and thread the nylon line exactly as recorded during removal. Then check the tension at all holes; the lens should have slight tension and no loose play. Finally, check each lens is flush, the screws are secure, and the nylon loops are correctly positioned.
Handle Lenses During Installation
Only touch the edges of the lenses to avoid fingerprints and stress points.
Quick-Test Optical Geometry After Changing Frames
After finishing the installation of lenses into the new frame, check that the optical geometry is correct to ensure comfort and safety. If issues appear, such as tilt, pinch, or slipping of lenses, stop immediately and micro-adjust the frame or visit an optician.
Level Line Test
Place glasses on a flat surface and check that the top edges of both lenses form a straight, level line.
Bridge Symmetry Check
Inspect the bridge placement; the bridge must be centered on the nose without any twist.
Temple Parallel & Fit
Check that the temples are parallel to each other and that there is comfortable contact with the ears. Check that spring hinges rebound smoothly without any resistance.
Instructional Video on Assembling Lenses and Frames
Watch this step-by-step lens replacement video from Glassesshop to see how to safely remove lenses from old frames and install them into new ones.
Clean and Protect Before Wearing
Wipe the lenses and the frame with a neutral cleaner and microfiber cloth to remove dirt. Then remove oils and smudges to ensure clear vision and to protect the coating. Store the glasses safely in a hard case to prevent scratches or accidental damage when not in use.
Maintain Monthly
Retighten screws lightly, check hinges monthly, and make sure the spring hinges rebound smoothly.
Recheck nylon tension for rimless or half-rim glasses every month too, if loose or noisy, adjust to maintain 1-2 mm tension.
Keep a mini repair kit, with screwdrivers, spare screws, and a microfiber cloth, handy for quick fixes.
When You Must Visit an Optician
For complex prescriptions or persistent discomfort after installation, such as headaches or dizziness, seek specialist help. If you discover the lenses are damaged with chips, cracks, or coating damage, the lenses must be replaced by a professional. If your glasses have a warranty or major deformation, do not attempt to replace them at home, and instead, go to an optician for professional help.
Repairing rimless lenses with chips at home is also high risk, since any stress can worsen cracks, potentially causing the lenses to shatter. Glasses with heavy coating damage can affect the clarity of vision.
Children’s glasses have durability and safety concerns; therefore, a professional should handle repairing or replacing these types of glasses.
FAQ
Can I replace the frame without changing lenses?
Yes, follow structure-specific and material-specific steps. Ensure lens tension is correct and perform the level line test after installation to check for proper alignment.
How do I run a nylon line on a rimless/half-rim?
Make sure you take a photo of the original hole order and loop path before removing the lenses from the old frame. When installing the new frame, follow the original order and loop path, then secure the nylon line carefully. Check the tension after installation, and there should be a 1-2 mm rebound.
How warm is safe for plastic frames?
If using water to warm the plastic frames, use water at a temperature of 40–50°C. If using a low heat hair dryer, use it for 20-30 seconds. Never exceed 55°C no matter which method you use.
What if a metal screw is stripped?
Stop immediately, then use the proper screwdriver bit, debonder, and extractor. If the screw remains stuck, visit an optician.
At GlassesShop, you can refresh your look with interchangeable frames, letting you reuse your favorite lenses while trying new colors and styles. This saves money, adds flexibility, and keeps your eyewear feeling new and fresh. With Buy One Get One Free, free shipping, and a 365-day warranty, upgrading your glasses is easy and worry-free.
Shop All Sunglasses >Shop All Eyeglasses >